This post may contain affiliate links. Please read our disclosure policy.
There’s something deeply comforting about making sourdough bread from scratch. It’s not just bread—it’s a process, a routine, and for many home bakers, like myself, a little daily ritual. From feeding your starter to pulling a golden, crackly loaf from the oven, sourdough baking feels both old-fashioned and incredibly satisfying. It definitely got me through lockdown during the pandemic. If you’ve ever felt intimidated by sourdough, you’re not alone. The good news? Once you understand it, sourdough bread becomes one of the most rewarding breads you’ll ever make.
In this guide, I will walk through everything you will need to know about making basic sourdough bread at home. This ranges from understanding your sourdough starter to baking a loaf with that signature tangy flavor and chewy crumb. My fool-proof sourdough recipe will help you achieve this.
Table of Contents
What Is Sourdough Bread?
Sourdough bread is a naturally leavened bread. Rather then using commercial yeast, it relies on a sourdough starter—a living culture of flour and water that captures wild yeast and beneficial bacteria from the environment such as Lactobacillus. This natural fermentation gives sourdough its distinctive flavor, texture, and longer shelf life. This sourdough bread recipe will help you on the road from beginner sourdough baker to advanced sourdough baker.
Unlike quick yeast breads, sourdough takes time. This is not necessarily a bad thing as the slower pace is exactly what makes it special. Fermentation not only develops a deeper complex flavor, but also improves digestibility and nutrient availability.
Since sourdough can be time consuming, it is important to understand how to space out your time to prevent things like missing the window when your starter is ready and even over proofing your bread dough.
Hydration Levels
My recipe for sourdough creates a 73% hydration dough. This is a higher hydration which usually produces more of an open crumb in your bread. If you are looking for a tighter crumb, you can lower the hydration using baker’s percentage.
Baker’s Percentage is an easy way to adjust a bread recipe. This is a technique in which whatever the amount of flour in weight used is treated as 100% and everything else is a percentage of the weight of flour.
For example, 62% hydration and 2% salt: 500g flour x .62= 310g water
500g flour x .02= 10g salt
Getting to Know Your Sourdough Starter
Your sourdough starter is the heart of your bread. Think of it as a pet—it needs regular feeding, attention, and a little patience. I have even heard of some people referring to it as— “the world’s most boring pet.”
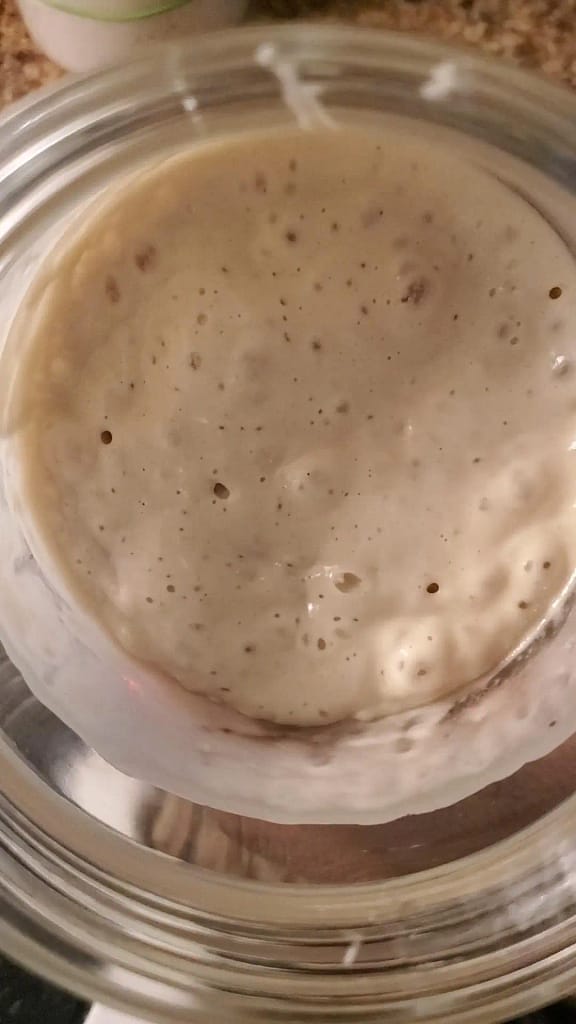
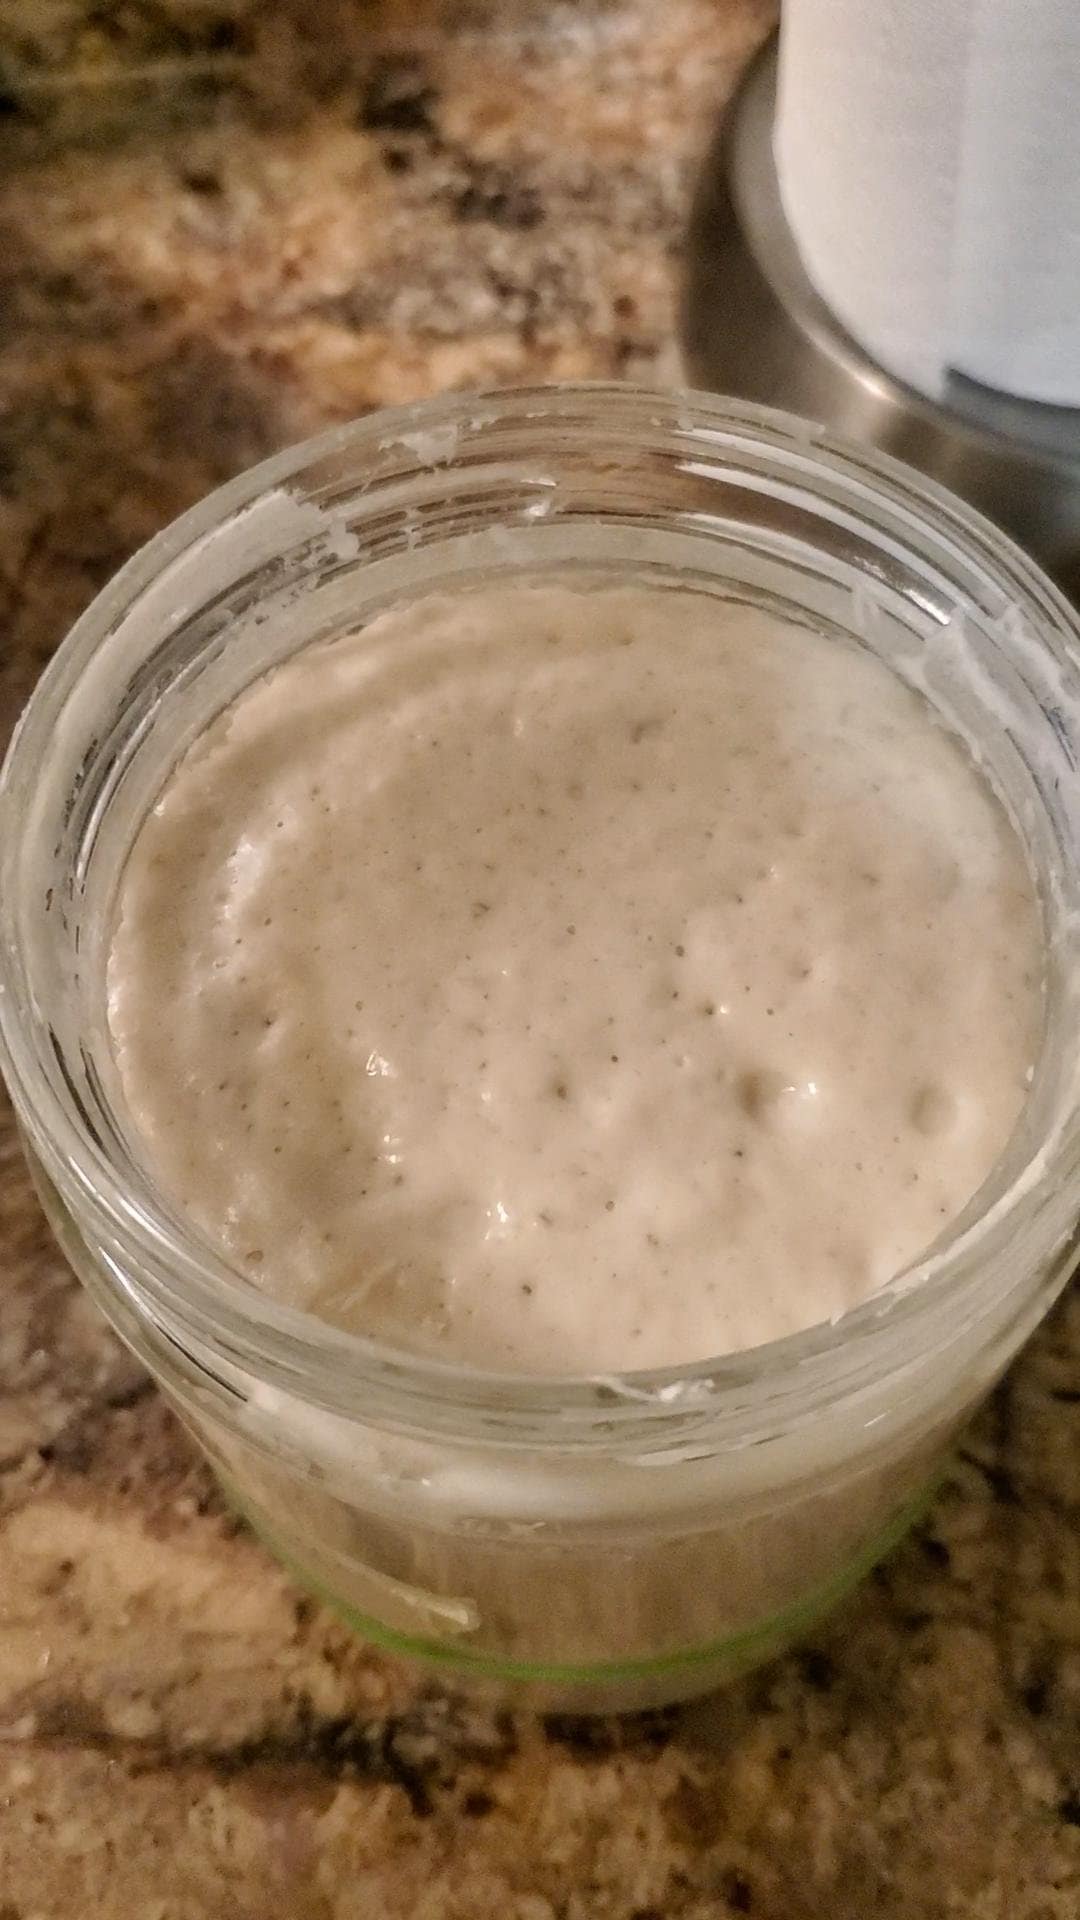
A healthy starter should:
- Be bubbly and active
- Have a pleasant, slightly tangy yeasty aroma
- Double in size a few hours after feeding
If you’re new to sourdough baking, it’s worth spending a few days learning how your starter behaves in your kitchen. Temperature, flour type, and feeding schedule all play a role in how active it becomes.
The whole process can be intimidating for some people which is why I recommend using a commercial starter just to get used to taking care of a sourdough starter or if you are having little success in creating a sourdough starter from scratch, you can get the King Arthur Sourdough Starter Kit which gives you all you need to make and raise a potent sourdough starter.
How to know when your sourdough starter is ready?
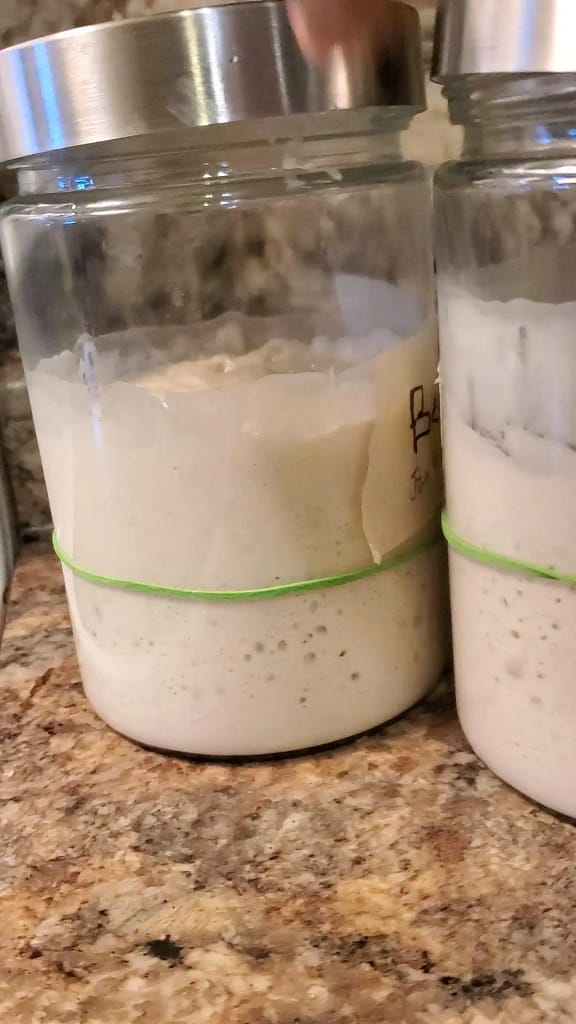
Your sourdough starter should have been fed 6-8 hours prior in order to make bread. The starter should double or even triple in this time. Once it has reached ‘peek’, it is ready to be baked with. Peek is the time when the starter has risen to its highest point and has not begun to collapse.
Usually if your starter has not risen within the 8hr window, your starter is not strong enough to make bread and you will need to strengthen it before you can trust it will work for your bread. One way to strengthen your starter is to add a drop of honey to the starter during feeding. This provides more food for the yeast in your starter.
Another way to strengthen your starter, is to switch to 1:2:2 or double feeding schedule.
1:2:2 feeding Example: 10g starter + 20g flour +20g water
Again having more food keeps your starter less acidic and gives the yeast more to eat. This is also why you want to regularly discard from your starter. It keeps the starter balanced as the natural fermentation produces lactic acid and too much acid weakens the yeasts ability to leaven the bread dough.
Ingredients and Tip
These are the ingredients needed to make a basic sourdough loaf.
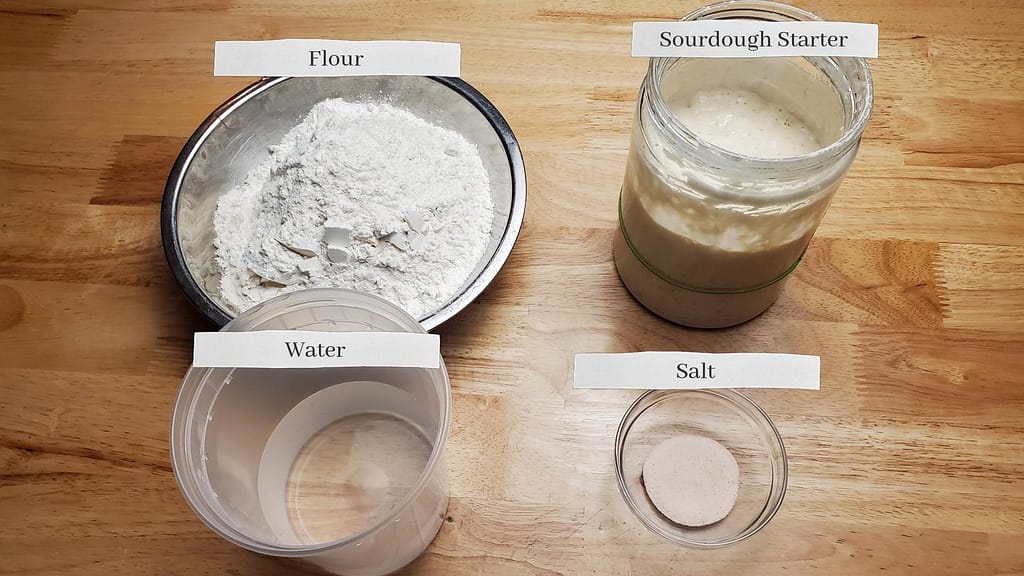
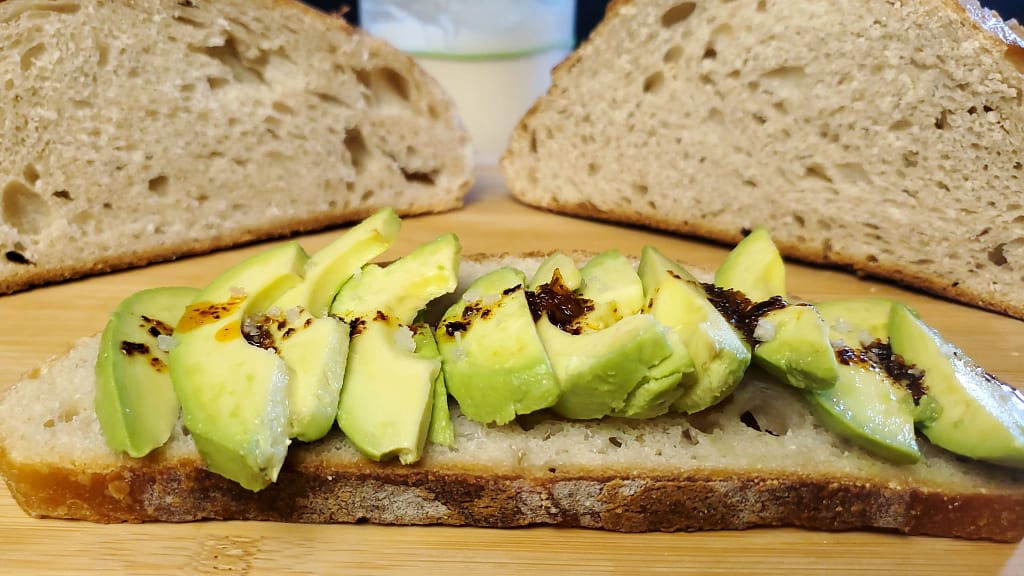
Flour – This recipe uses bread flour which has a higher protein content then all-purpose flour. This higher protein content aids on the structure of the bread, gives a more chewy texture, and forms a nice crust. I have also made this recipe with all-purpose flour. I loved the result also as the bread is even softer and crust is also a bit softer. For me, flour choice is about preference of textures and flavors.
Sourdough Starter – My sourdough starters, Benny and Canarie, were made in early January 2026 so they are relatively new but very active and potent. The sourdough starter holds the wild yeast that leavens the bread. Benny is a bread flour starter and Canarie is an all-purpose flour starter. Sourdough starter should be used at peek or at a little after it begins to fall. You can also use a good commercial sourdough starter if you don’t want to make one yourself.
Water – Hydration is very important to bread as it helps soften the crumb and also helps to create a nice crust through steam.
Salt – salt adds flavor to the dough and aids the yeast in fermentation. The salt slows the fermentation down which helps the dough to not over ferment and become sticky. The average salt amount used in most doughs and ferments is usually 2%. My recipe has a 2.6% salt content.
Save This Recipe!
Enter your email address and we’ll send it straight to your inbox.
Autolyse Technique
Autolyse (aw-toe-leese) is the technique of mixing the flour and water together and then allowing this mixture to rest about 30-60 mins before adding the sourdough starter and salt.
This allows the flour to be hydrated upfront which helps with early gluten development. Gluten development begins while dough is resting without any kneading. Enzymes in the flour activate and begin breaking down proteins in the mixture. This gives the dough more extensibility.
Extensibility is the ability of the dough to be stretched without tearing. Usually it takes a lot of kneading for your dough to develop this attribute, which is due to the sourdough starter or yeast. This is a sign of well developed and relaxed gluten network.
The yeast and bacteria in the sourdough starter naturally begin to break down the glucose and gluten once added to the dough so the autolyse method helps to create a strong gluten network upfront.
Extensibility should not be confused with Elasticity. Elasticity is a property of the dough when it has been worked so much, the gluten network tightens up which causes the dough to pull back to its original size when stretched.
Elasticity can be thought of like a rubber band being stretched and then going back to its original state once it is released.
This recipe will not cover the autolyse technique as I wanted to keep this recipe super simple. However, I feel it is important to discuss this technique as it will be used in other recipes especially when we experiment with other types of flour.
The Equipment Needed
Most important items…
A healthy sourdough starter
Salt
Flour- Bread flour or All-Purpose flour depending on the wanted texture
Water
Nice to have items…
Bread Lame (razor on a stick)
Proofing Container, for bulk fermentation
My Latest Video
Before You Start!! If you make this, please leave a review and rating letting us know how you liked the recipe. This helps our business to do well and continue providing free recipes.
Easy Sourdough Bread
Video
Ingredients
- 150 g active sourdough starter ¾ cups
- 363 g warm water (108°F-110°F) 1½ cups
- 500 g bread flour 4cups + 3 tbsp
- 13 g salt 2 tsps
- Rice flour, for dusting banneton
Instructions
Making Dough
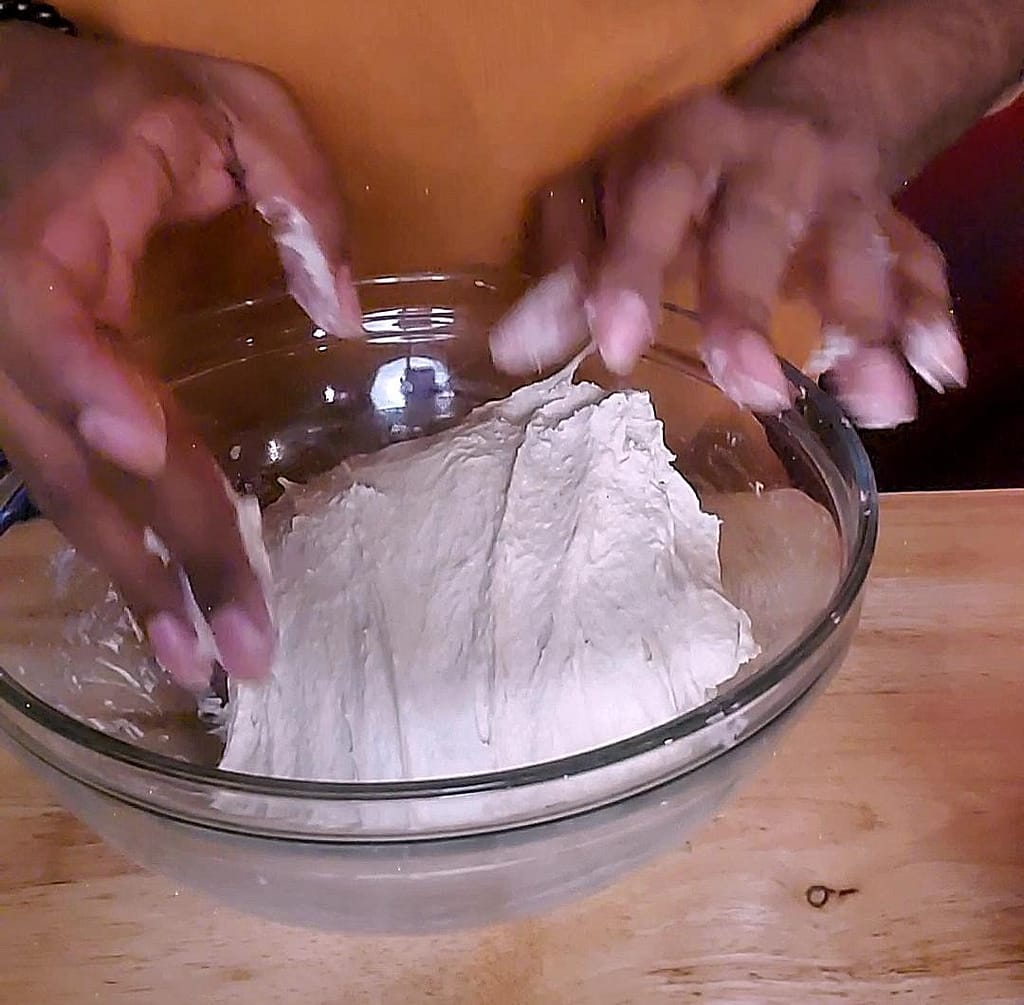
- In a large bowl, add the water and active starter. Mix until starter is dissolved in water.
- To the same bowl, add the bread flour, and salt. Mix until a shaggy dough forms. Cover and let rest for 1 hour.
Stretch and Folds
- First stretch-and-fold: Wet your hands to make working with the dough easier. Pull part of dough up and fold over rest of dough, turning bowl as you go until you have did full circle around the bowl. Repeat this until you have done 8-10 stretch-and-folds. Cover and let rise for 30 mins.
- Second stretch-and-fold: Repeat previous step, but only do 4 stretch-and-folds. Cover and let rest for 30mins.
- Third stretch-and-folds: Repeat previous step, but only do 4 stretch-and-folds. Cover and let rest for 30mins.
- Fourth Stretch and folds: Repeat previous step, but only do 4 stretch-and-folds. Cover dough and let rest for 2 hours or until doubled in size (bulk fermentation)
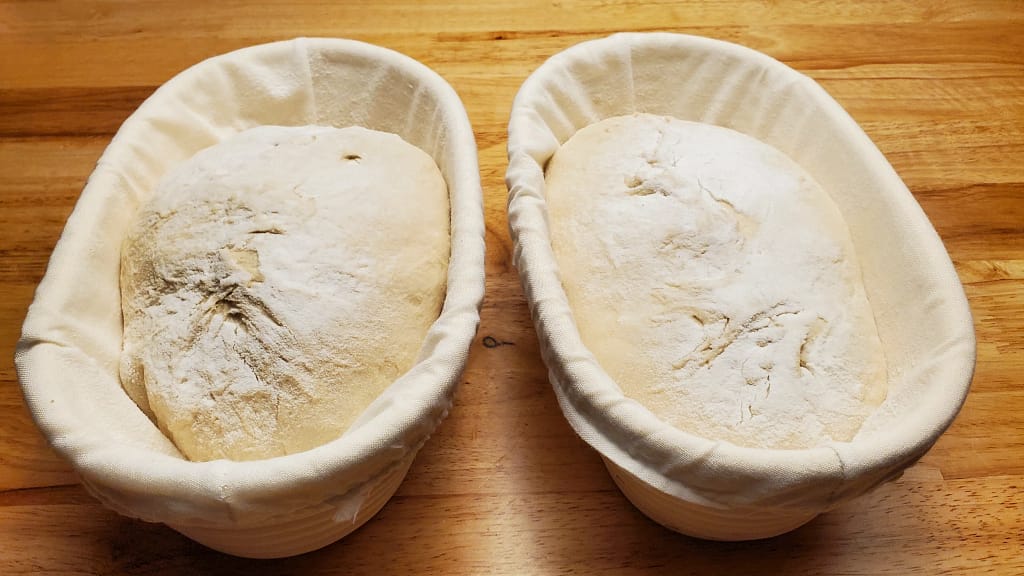
Lamination and Shaping
- Pour dough out onto floured surface. Gently spread dough into a rectangle. (Do not de-gas dough.) Do a letter fold by folding one side of dough to the middle of dough. Then fold the other half of the dough on top of the first side of the dough.
- Beginning at the end closet to you, start rolling dough away from you, making sure to keep the tension in the dough. Pinch ends closed. Begin pulling the dough into a ball, using tension on the work surface. Cover with a bowl or tea towel and let rest on work surface for about 20 minutes.
- After 20 minutes, reshape dough by repeating previous steps.
- Using rice flour, flour banneton basket. Put the dough into the basket seam side up. Stitch dough together if necessary. Sprinkle with more rice flour. Cover and put in refrigerator for about 3-12 hours, for cold fermentation.
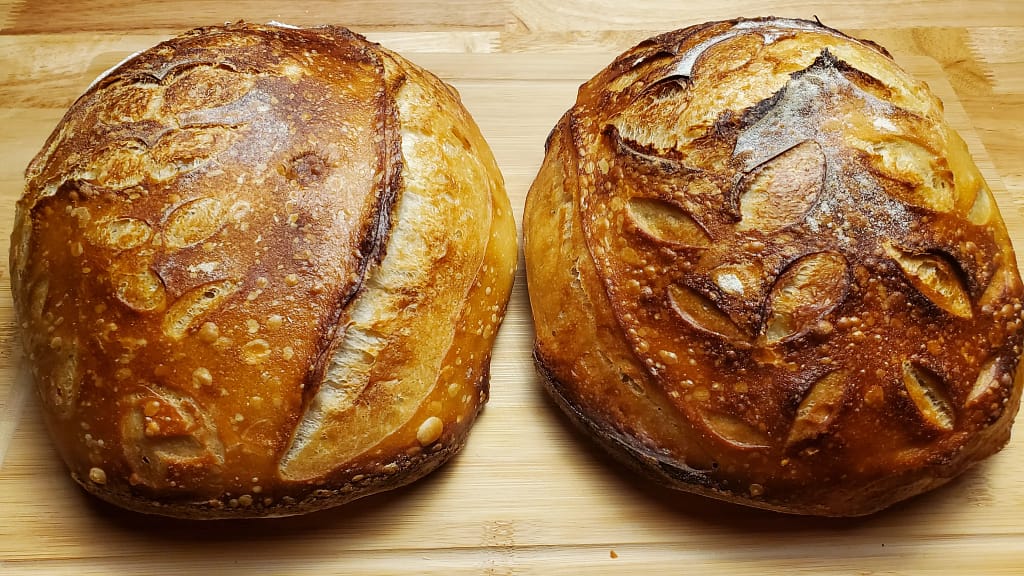
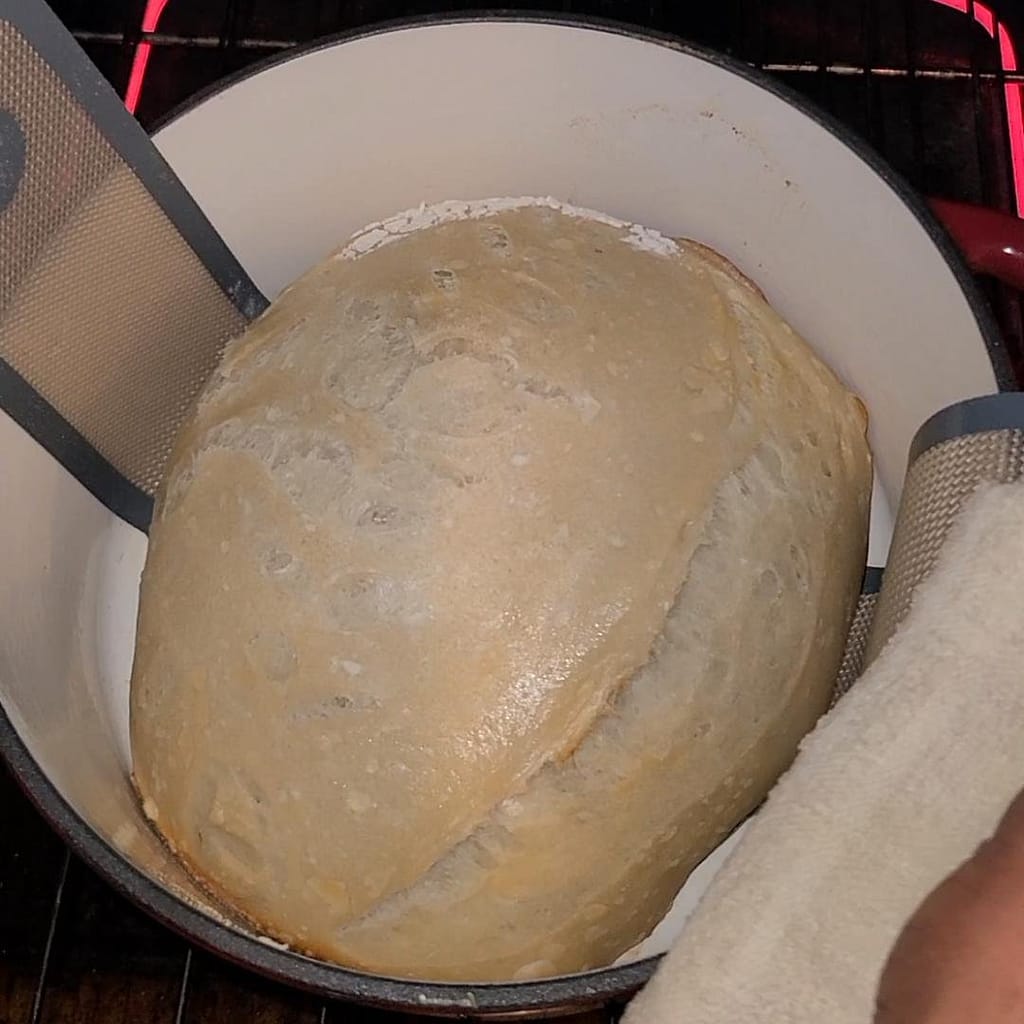
Dutch Oven Baking
- Preheat oven to 450°F. Add in Dutch oven without lid. Allow pot of Dutch oven to preheat for about 30mins.
- Pour cold dough out onto parchment paper or silicon baking mat.
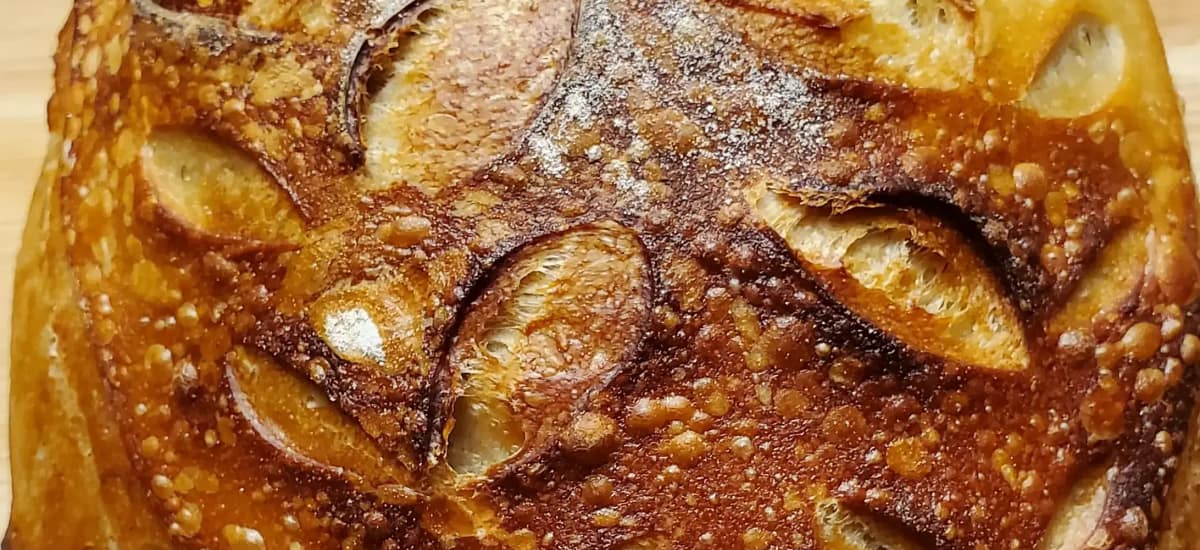
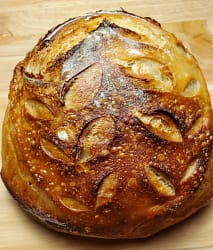
- Using bread lame, cut whatever design you like into the dough. Then cut an expansion score at a 45 degree angle from the top of the dough.
- Place dough into Dutch oven. Add a few ice cubes around the dough. Place lid on the Dutch oven. Place Dutch oven in stove.
- Bake at 450℉ for 30 minutes covered.
- Remove lid and bake an additional 15-16 mins long. Bread is done when internal temperature of 205℉-210℉.
- Enjoy!!
Notes
Nutrition
More Delicious Recipes

This post may contain affiliate links. Please read our disclosure policy. If you’ve ever been intimidated by making caramel from scratch, you’re not alone. The good news? With a few simple ingredients and a little patience, you can create a smooth, buttery caramel sauce that rivals anything store-bought. Let’s break it down step-by-step so you can…

This post may contain affiliate links. Please read our disclosure policy. Whether you’re a beginner baker or looking to elevate your decorating skills, this royal icing recipe guide will walk you through everything you need to know about royal icing—from how to make it to tips for achieving flawless results every time. If you’ve ever admired…

This post may contain affiliate links. Please read our disclosure policy. Whether you’re baking for a family gathering, creating gifts, or simply enjoying a relaxing afternoon of decorating, hand-painted sugar cookies bring a personal and elegant touch to any Easter celebrations. These no spread sugar cookies are perfect to decorate until your heart is content. There’s…
This post may contain affiliate links. Please read our disclosure policy. There’s just something special about a good pound cake—it’s simple, comforting, and always hits the spot. But this 5 flavor pound cake? It takes everything you love about a classic pound cake and turns it into something unforgettable. This southern pound cake recipe will mentally…

This post may contain affiliate links. Please read our disclosure policy. An English muffin recipe was a no-brainer. English muffins are a timeless breakfast staple known for their crisp edges, soft interior, and signature “nooks and crannies”. They go perfectly with melted butter, jam, or savory toppings. Though the store-bought ones are not anything to write…

This post may contain affiliate links. Please read our disclosure policy. If you’ve ever dreamed of indulging in a treat that feels both luxurious and timeless, Turkish delight is exactly that. Known for its delicate texture, fragrant flavors, and dusting of powdered sugar, this centuries-old confection has captured hearts (and taste buds) around the world. Whether…