This post may contain affiliate links. Please read our disclosure policy.
This is one of the easiest and flakiest pie crust recipes you will find anywhere. A flaky pie crust is truly less about ingredients and more about technique. A truly flaky pie crust is a great achievement for any baker, and is important if you want a truly flavorful crust.

Ready to try this recipe? Shop my pie baking list! The pie crust is the quiet hero beneath bubbling fruit fillings, silky custards, and savory pot pies. It adds texture, structure, and buttery flavor to every bite. It is truly an element that when executed correctly, blends perfect with the pie or tart. However, when it is bad, it stands out and takes away from the overall flavor of your dish or dessert. A good flaky pie crust shatters delicately under your fork, revealing tender layers that practically melt in your mouth.
Table of Contents
Why Homemade Pie Crust Is Worth It
We are all guilty of keeping store-bought pie crusts. They stay in the back of the freezer until we need to toss a quick dessert together. Store-bought crusts most certainly offer convenience, but homemade flaky pie crust delivers superior flavor, texture, and satisfaction.
The aroma of butter baking into golden layers and the pride of slicing into a pie made completely from scratch makes the effort worthwhile.
Whether you’re baking a classic apple pie, a rich pumpkin pie, or a savory quiche, mastering a flaky pie crust elevates every recipe it touches. With cold ingredients, gentle handling, and a little patience, you’ll create a crust that’s as memorable as the filling it holds.
What Makes a Pie Crust Flaky?
Flakiness comes from cold fat, usually butter or shortening, being cut into flour and left in visible pieces. The fat adds tenderness, but also creates steam pockets. As the pie bakes, those cold pockets of fat melt and release steam, creating tiny layers and air gaps in the dough. This is what gives pie crust its signature flaky texture rather than a dense or crumbly one.
Butter is especially prized for flaky pie crust because it delivers unmatched flavor and creates crisp, defined layers.
For this recipe, I use both butter and shortening. Shortening melts at a higher temperature than butter so it is perfect for making the dough tender, adding to the structure, and making the recipe more fool proof. This combination of butter and shortening adds a balance of flavors and structure. Of course an all-butter crust is very possible but it is definitely a much more temperamental creature, in that you have to be more meticulous about not over-mixing the dough.

The Importance of Cold Ingredients and Utensils
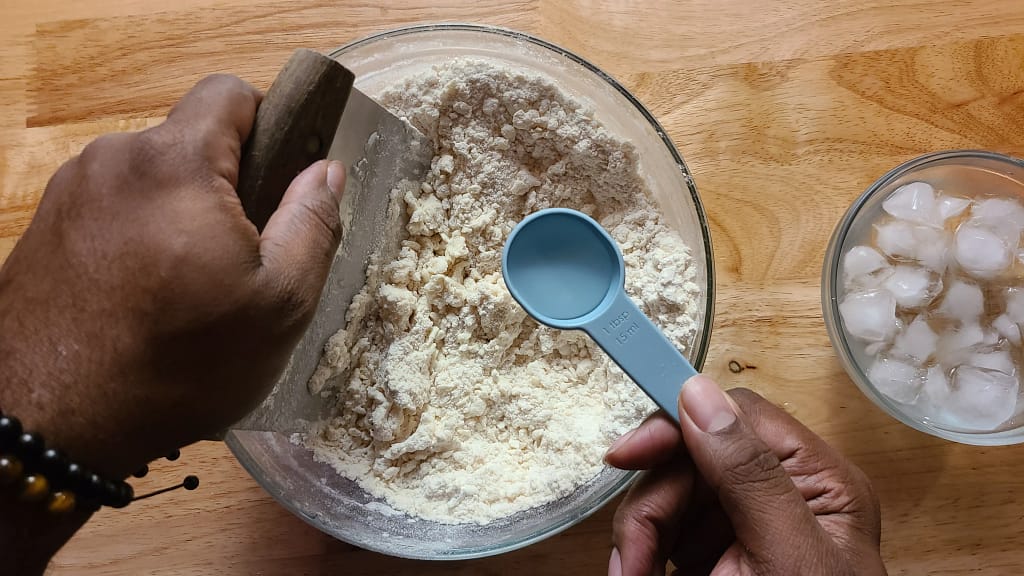
When making pie crusts, temperature is everything. Cold butter, ice water, and chilled flour help prevent the fat from melting too quickly. If the butter softens before baking, it blends too thoroughly with the flour and eliminates those essential flaky layers. To prevent this, I recommend placing the bowl and bench scraper you will be working with in the freezer along with the flour, butter, and shortening.
I also chill the butter after it has been grated in the freezer for 5–15 minutes before cutting it into the flour. I also refrigerate the dough before rolling it out. These extra steps may seem small, but they make all the difference in the final texture of the pie crust.
Mixing and Handling the Dough
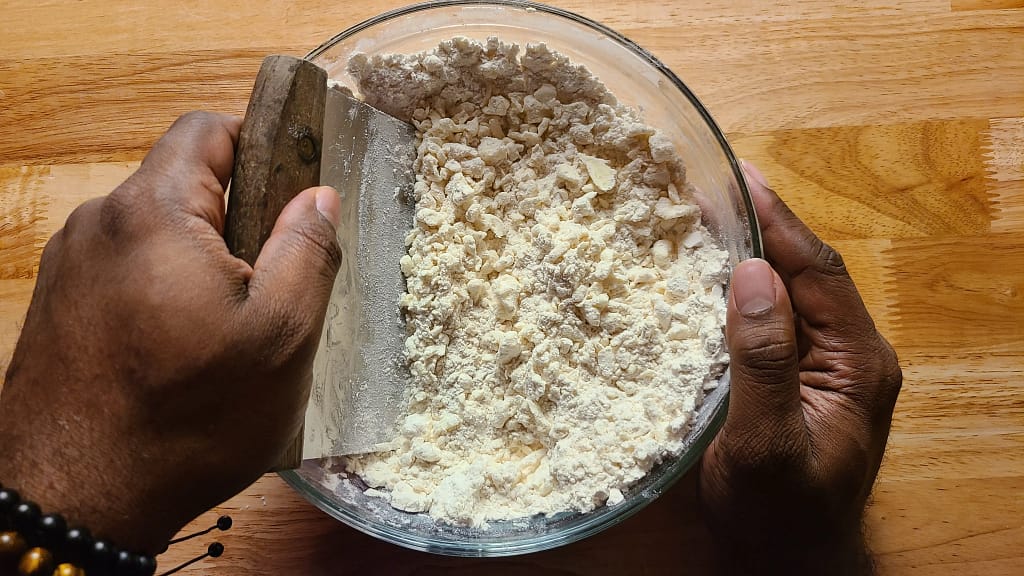
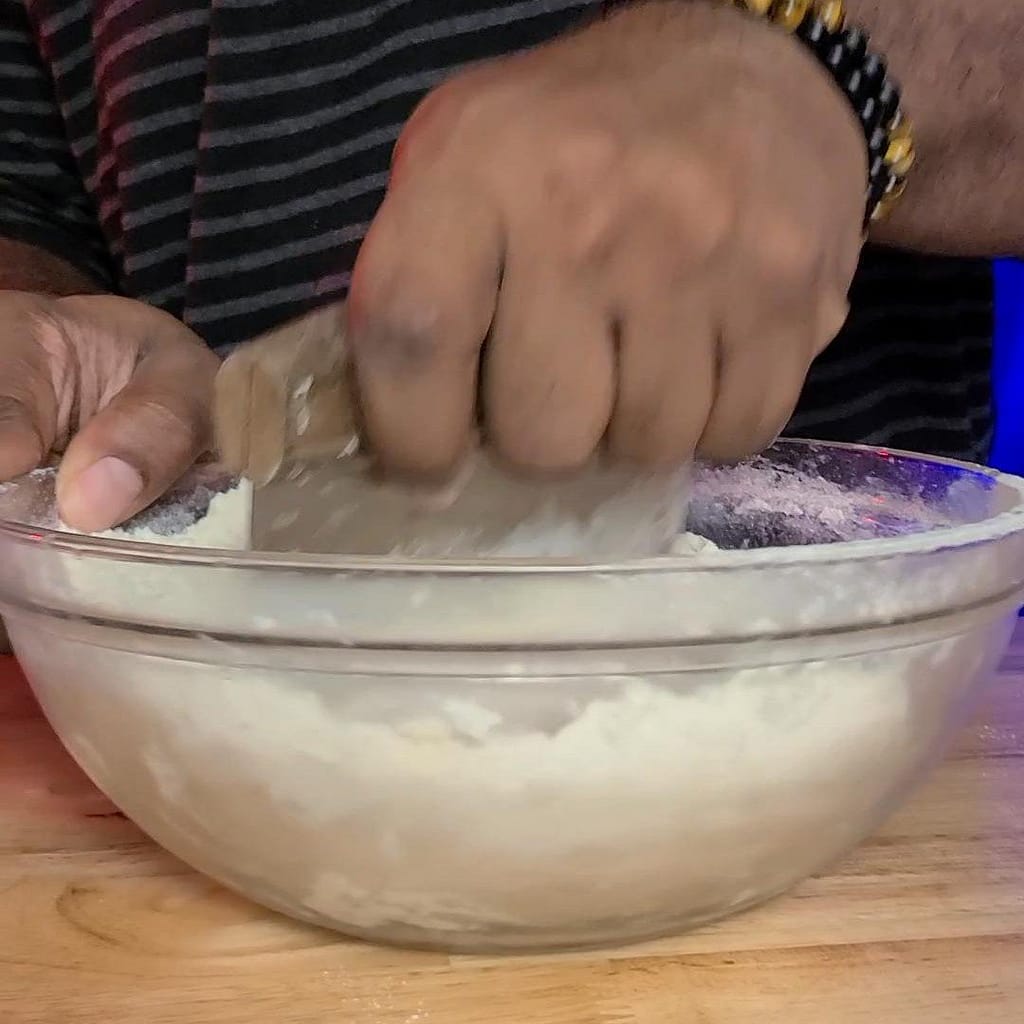
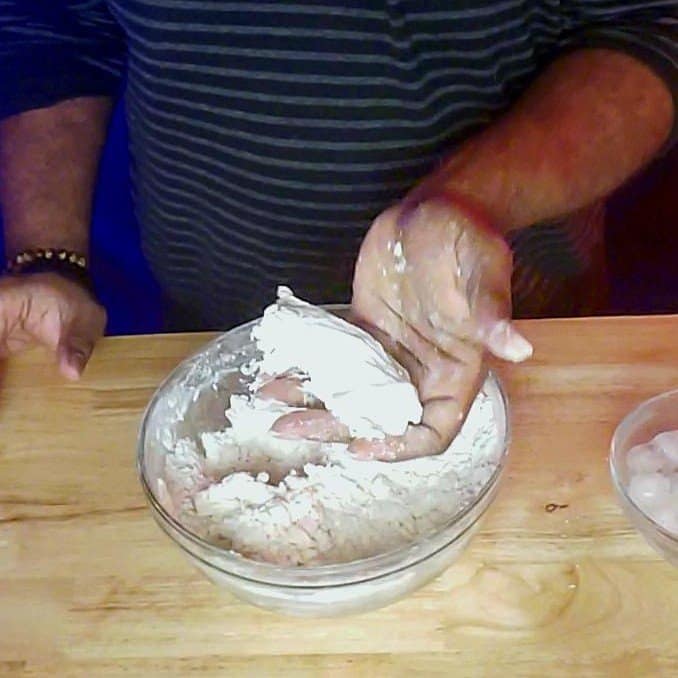
Using a bench scraper or your fingertips, gently combine the butter and flour until the mixture resembles coarse crumbs with pea-sized bits of butter.
The trick is to do as little mixing as possible. Too much working causing the butter to melt and meld into the flour too much. This makes the crust less flaky or dense. A good precaution to take as to not warm-up the dough too much while you are working, is to wear gloves during the process.
You want to add ice water gradually, just enough to bring the dough together. A slightly shaggy dough is perfectly fine—it will smooth out as it rests. The recipe card below describes this technique in more detail.
Common Pie Crust Mistakes
Over-working Dough
One of the most common pie crust mistakes is overworking the dough. Too much mixing develops gluten, which leads to a tough crust instead of a tender one. It also causes the butter to melt into flour which creates a dense crust.
Not Resting Dough
It is important to rest dough to get the proper texture. Resting the pie crust dough allows the gluten to relax and allows the dry flour to hydrate properly.
Adding Wrong Amount of Water
Having the right amount of hydration in the dough is important. Too little cold water and the dough will not come together properly. The dough will also crack. Too much water will make the dough dense and more like biscuit dough.
Baking Tips for Crusts
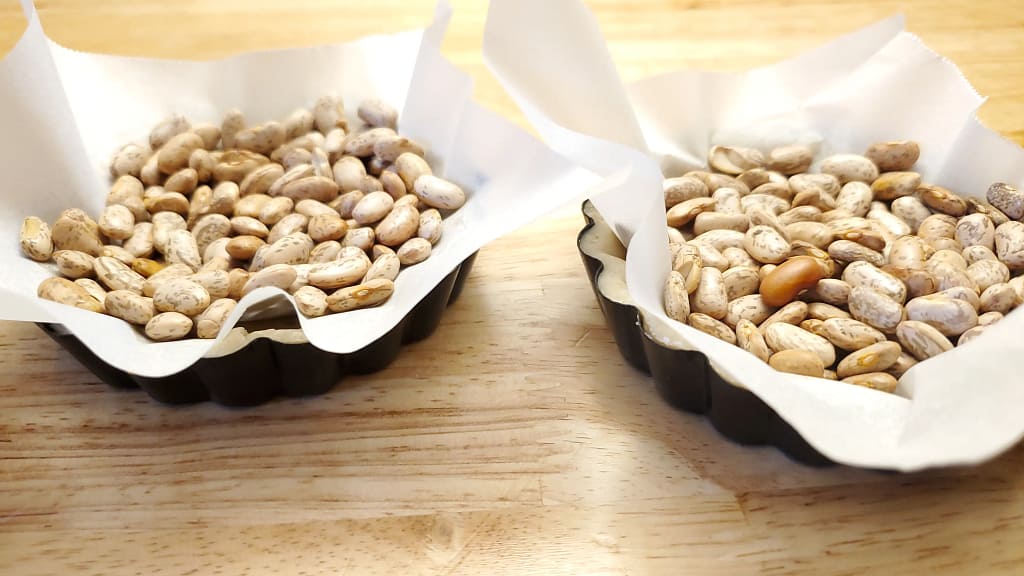
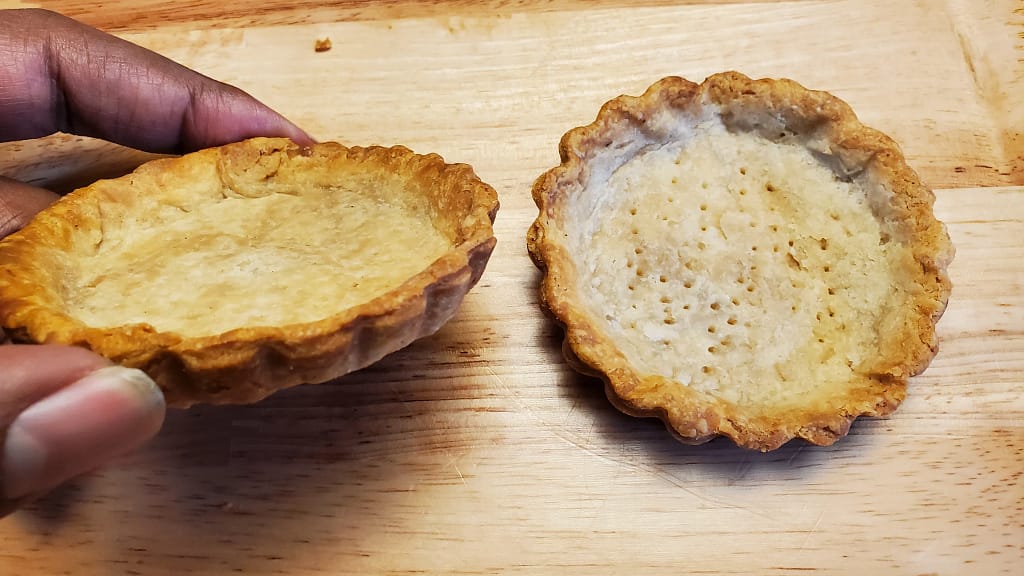
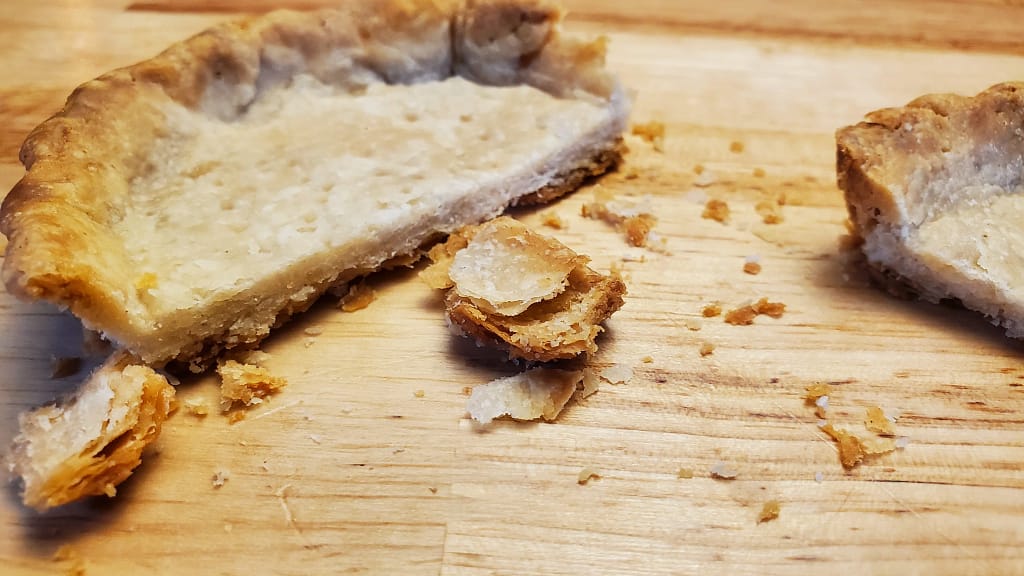
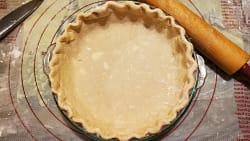
Blind Baking– For extra crispiness, I blind-bake the pie crust. This is important especially for tarts with custard or cream pies. I line the dough with parchment paper and fill it with pie weights. This helps to maintain the crust’s shape while it sets. Baking on a lower oven rack or on a preheated baking stone can also promote a well-browned, flaky bottom. No more soggy bottoms.
Pie Weights– Pie weights are heat resistant balls, usually made of metal, ceramic, or silicone. They are used to help pie dough hold its shape and prevent shrinking as it blind bakes. While it is nice to invest in pie weights, for a cheaper and just as effective alternative you can use dried beans or rice as your weights. Another good thing about this method is that you can reuse them again and again without worry.
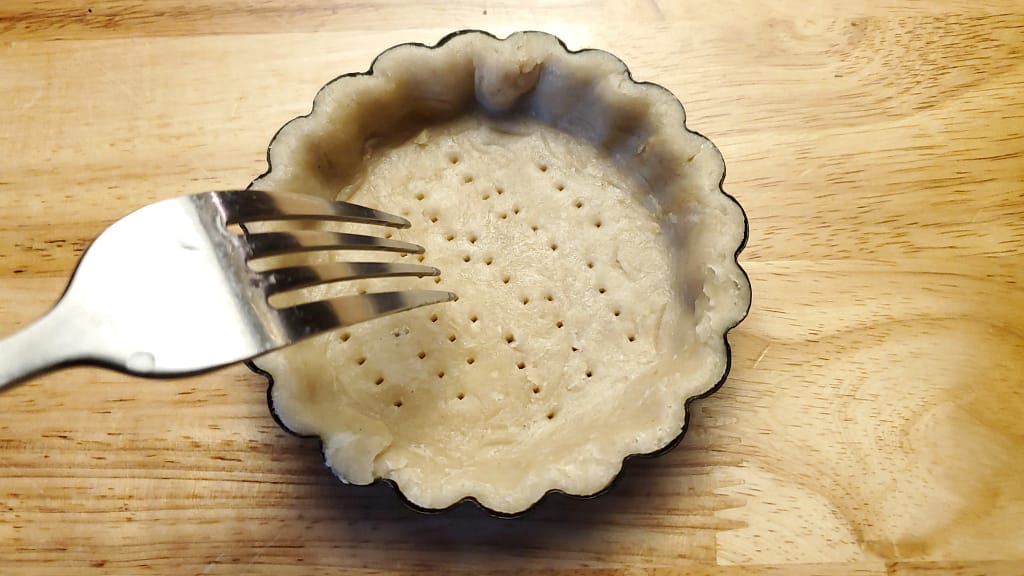
Docking– Docking is a technique used to prevent the bottom of a pie crust from rising when it is being blind baked. You take a fork or skewer and poke tiny holes at the bottom of the crust. When making tarts, this allows the tart shell to bake evenly, maintaining the shape of the tart pan.
Latest Videos
Before You Start!! If you make this, please leave a review and rating letting us know how you liked the recipe. This helps our business to do well and continue providing free recipes.
Perfectly Flaky Pie Crust
Equipment
- food processor optional
- large metal or glass bowl
- Plastic Wrap
Ingredients
- 3 cups all-purpose flour
- 1 tbsp granulated sugar
- 1 tsp salt
- 10 tbsp unsalted butter, cold
- 5 tbsp vegetable shortening, cold
- 1 tbsp white vinegar
- ⅓ cup iced water more or less as needed
Instructions
- Using a box grater or food processor grating attachment, grate the cold butter into a medium bowl.
- To a large bowl or food processor, add the flour, sugar, salt, grated butter, and vegetable shortening. Put the entire bowl or food processor basin in the freezer for 5 mins. This will allow the butter to firm up again.
- After 5mins in the freeze, remove the bowl. Grab your bench scraper and begin cutting the butter and shortening into the flour. shortening should be pea-sized and entire mixture should be like course sand. (If mixture gets to warm, return it to the freeze to firm up.)
- Add vinegar. Pour ice water in small amounts into the flour mixture while cutting the mixture together. Just add enough water until a shaggy dough forms. It is fine if you have some dry bits.
- Pour dough out onto your work surface. Start pushing dough together using quick touches so you do not warm up the dough too much. Fold the dough onto itself. Visible pieces of butter and shortening should be present (Do not over work. We want to minimize gluten production.)
- Cut the dough in half. Wrap each piece of dough in some plastic wrap. Refrigerate for a minimum of one hour.
- Use the dough how you like.
- Enjoy!!